Inbox
EmailTree helps you create a perfect ecosystem where you and your team can build a knowledge base and use it to respond better and faster to your clients. The more accurate the knowledge base is and the higher the confidence level is, automation is just around the corner. To achieve that, here are a few steps that explain the mechanisms.
Conversation list
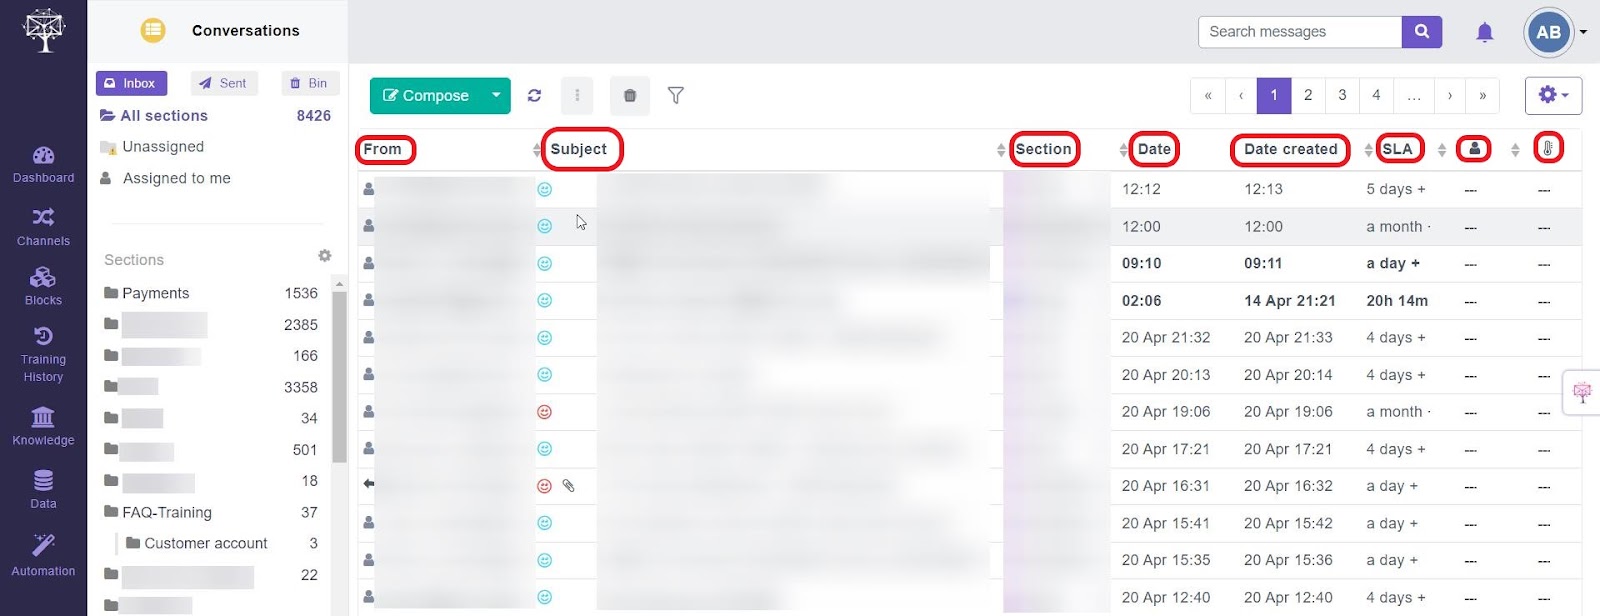
As an email enters the EmailTree inbox, the algorithm analyses the email's content, extracts all the essential information, and assigns it to the correct section. Therefore, EmailTree assigns a message to the right section and helps prioritisation through sentiment level and SLA. You can quickly view the message by hovering over the subject without entering the message view.
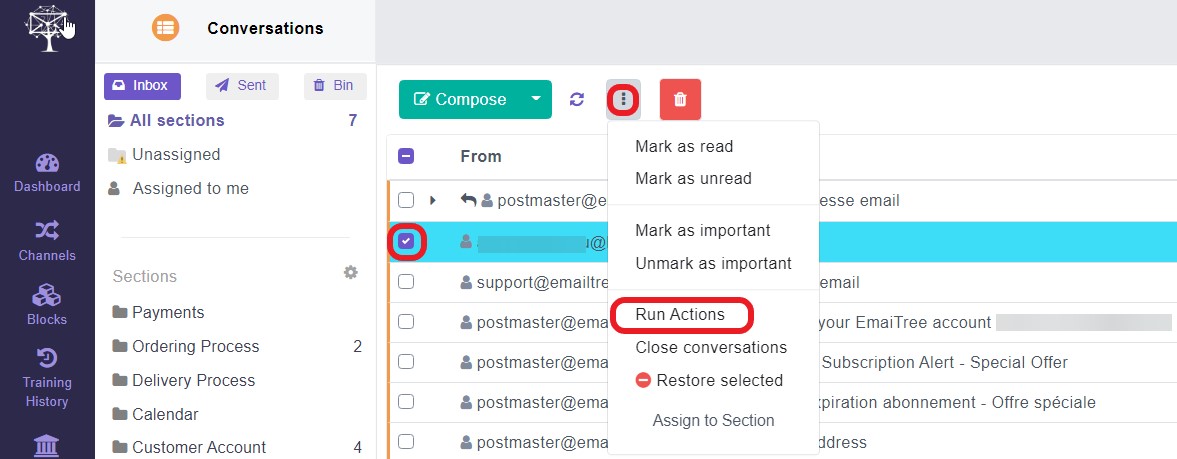
Run Actions in the Conversation list
Run Actions works in combination with the Action Manager in which we define certain rules for automating tasks inside or outside of the EmailTree application.
Following the creation of the actions based on the rules, we can select from our inbox the conversations we wish to run the actions on.
When the actions are set up in Action Manager, they will automatically run on selected conversations and fulfil certain tasks.
Delete and restore messages
When we delete any messages from our conversations list in EmailTree, the message will go into a hidden page, which we can access by clicking on the Bin. Therefore, we will be able to see the deleted messages with a red font and a red strikethrough.
Deleted messages will not be completely removed from the application in order to prevent losing certain information, as well as to avoid affecting the training. We can also permanently delete all the messages by clicking on Empty bin or if we want to delete just several messages, we select them and we click on Delete forever.
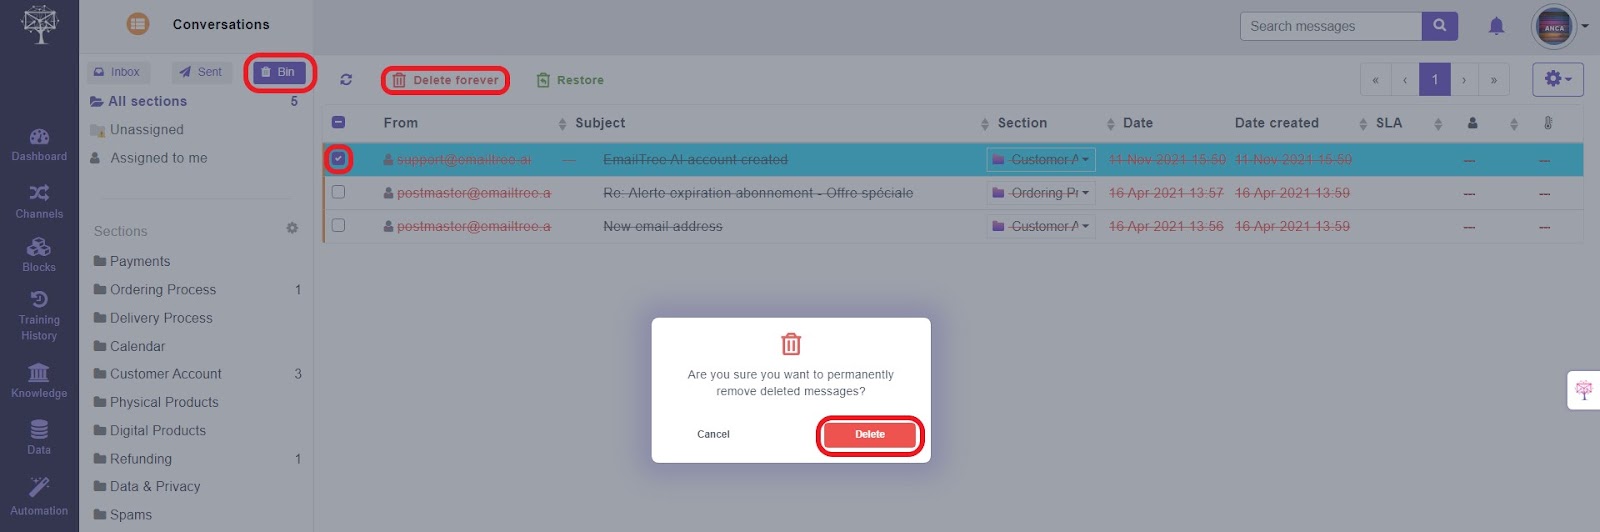
In order to restore messages we select then, then we click on Restore and the messages will go back to the Inbox.

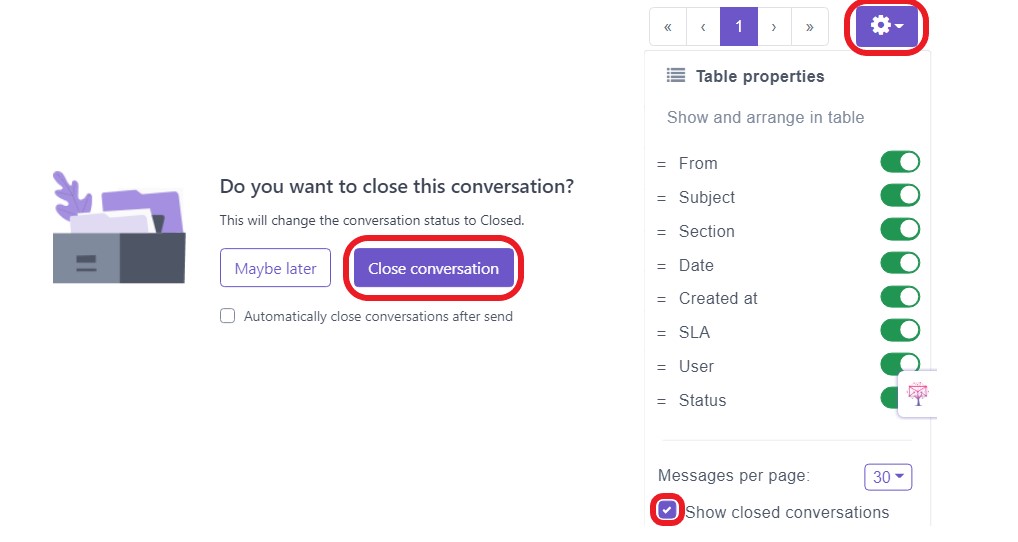
Close Conversations
As soon as we send a message, EmailTree will let us know if we wish to close the conversation.
By default, closed conversations become hidden so that you can focus on the ones remaining in the Conversation List.
To make them visible again in the list, click the gear setting icon from the right side and select the "Show closed conversations" from the drop list. The green dot in the Status column indicates that the message was closed, and by changing it, it will become visible in the Conversation List even if you uncheck "Show closed conversations."
Sort table list
You can sort your listing from the Conversation as follows:
Click on the Subject label to sort messages by the subject name.
Click the Section label, and select a section from the drop list to sort by Section. The same thing applies when sorting by User or by Status.
Click on the Date label, select a beginning and an end date to sort by date.
Click on SLA to sort the list by the time left to finish the task, ascending or descending.